 Technology
An integrated development environment (IDE) is a software application that provides comprehensive facilities to computer programmers for software development. An IDE normally consists of:
1. At least a source code editor;
2. Build automation tools;
3. Debugger.
The boundary between an IDE and other parts of the broader software development environment is not well-defined; sometimes a version control system or various tools to simplify the construction of a graphical user interface (GUI) are integrated. Many modern IDEs also have a class browser, an object browser, and a class hierarchy diagram for use in object-oriented software development.
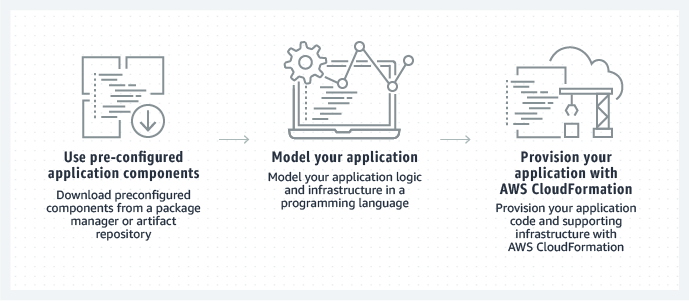
The AWS Cloud Development Kit (AWS CDK) is an open-source software development framework to define your cloud application resources using familiar programming languages.
AWS CDK deploy resources in a safely and repeatedly way, by utilizing AWS CloudFormation
You can define your application infrastructure model by coding, you can using programming language like TypeScript, Python, Java, .Net, go etc.
In short, letting you deploying resource using programming language through CDK, it is little bit like CloudFormation but coding version, if you are familiar to programming enough, it will be easier and faster on deploying than using JSON or CSV template.
You can define your application infrastructure with shorter code, also can define more details when you need.
Last but no least AWS CDK can also using CLI to export you CFN template, or you can just deploy it with CLI.
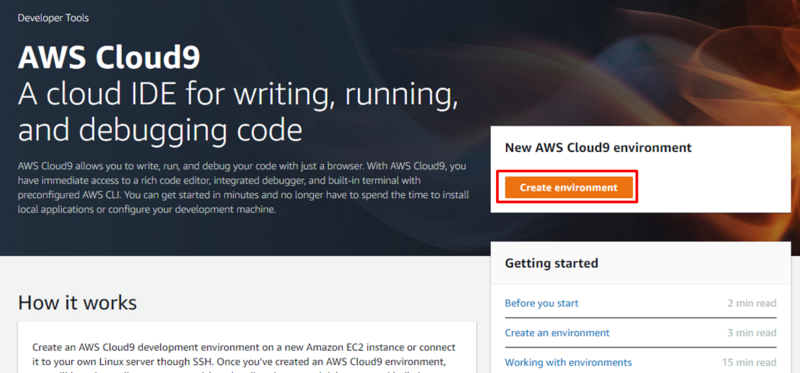
Cloud9 is a cloud integrated development environment, compare to traditional IDE, which need install in local environment to start with, Cloud9 don’t need any installation, you can operate through your browser. Another thing to mention when Cloud9 is being created, it will also install some common Linux packages included AWS CDK.
Until now Cloud9 support two types of operating system which is Amazon Linux and Ubuntu 18.04 LTS.
If you have customization needs, you can customize Amazon Linux’s AMI for your development environment or even using SSH to connect Cloud9 instance.
The combination of AWS Cloud9 and CDK compare to deploy normal server based application, it more fit in deploy serverless architecture, because both of them are Coding as a Service.
Next, we will go through some AWS Cloud9 and CDK practices for showcasing.
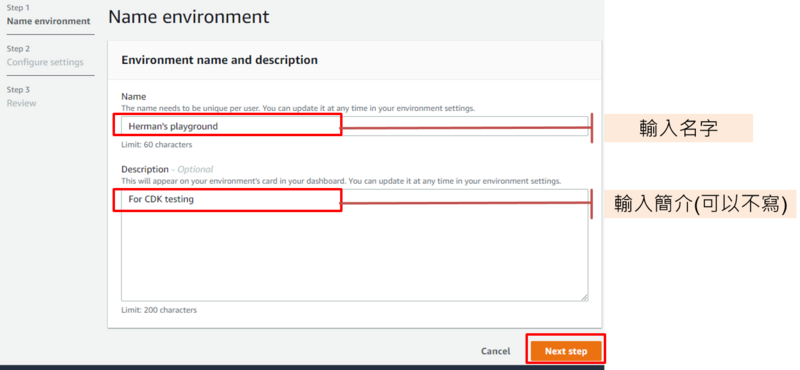
Task 1: Create a Cloud9 CDE
Task 2: Create a VPC and EC2 instance with CDK
Task 3: Modify the EC2 instance’s Subnet
Task 4: Export the building template and Clean up
1. Create a new EC2 instance for environment (direct access)
2. Create a new no-ingress EC2 instance for environment (access via Systems Manager)
3. Create and run in remote server (SSH connection)
Here we will left as default.
About instance type it depends on your own needs, normally you will need more memory for building code. Since we are not going to build a large project we will left as default too.
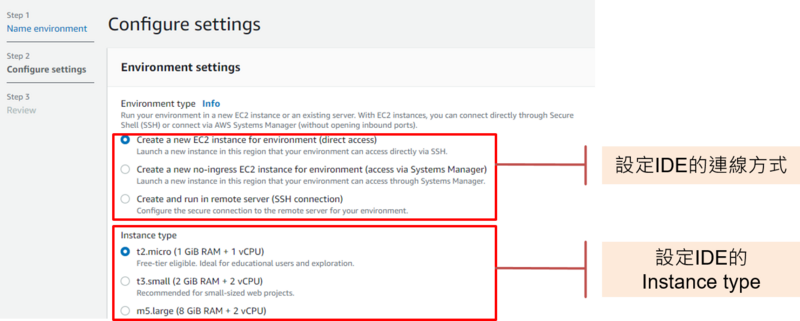
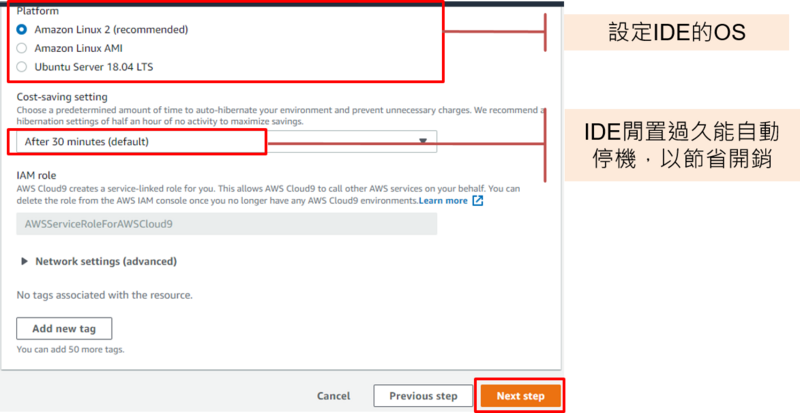
Last, choose the OS that you need. AWS support two type of OS natively, which is Amazon Linux and Ubuntu 18.04 LTS. If you need other environment, you have to connect to instance and install yourself. At network settings, if you have to download packages from internet, make sure you have the right setting to connect to internet.
About cost-saving setting, when CDE aren’t being use for a certain time, it will stop the instance automatically to saving cost, the default setting is “After 30 minutes”.

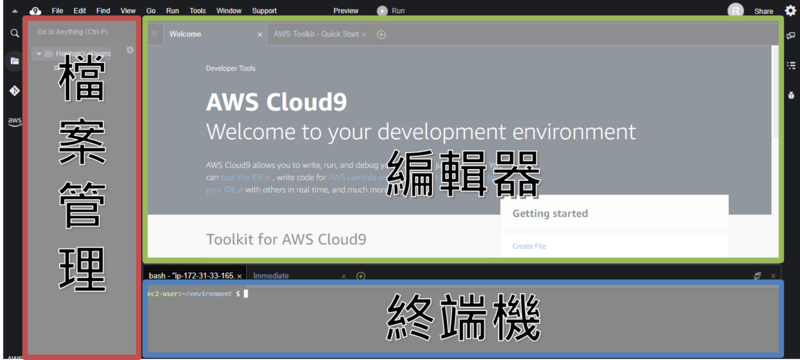
The layout can be divided by three parts:
1. Editor: where you will coding at;
2. Terminal: where you use your command;
3. File management: all project’s files can be found here.

Command:
$ mkdir TestApp
$ cd TestApp/
You can choose between in JavaScript, TypeScript, Python, Java, C#, Go. I prefer Python so I choose it here, you can choose yours.

Command:
$cdk init --language $(python)
$(python) can be replaced the programming language you want to use
Please check the CDK version is version 1 or 2, according different CDK version, the ways to define components and constructors are different too. For more detail, Please check AWS CDK official library.
Here we are going to use version 2.8.0.
 Command:
$ npm install –g aws-cdk
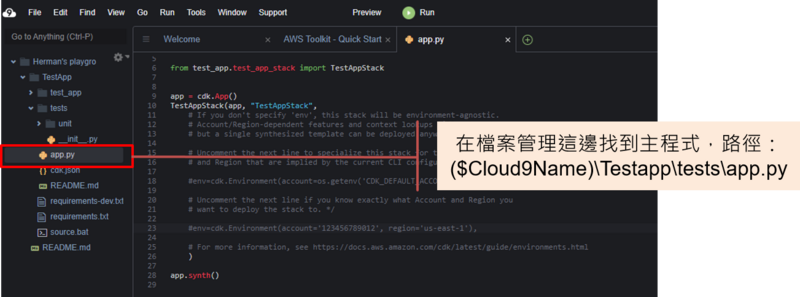
Step 10 Find your main function and open it
Change the account build with and region you want your application stack build in.
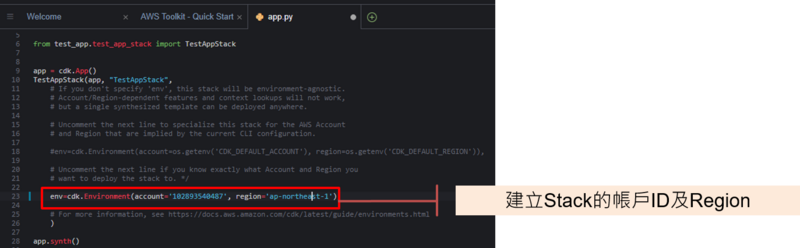
It also setup some roles you need before your first deploy with cdk. When It success it will show the variable you set.
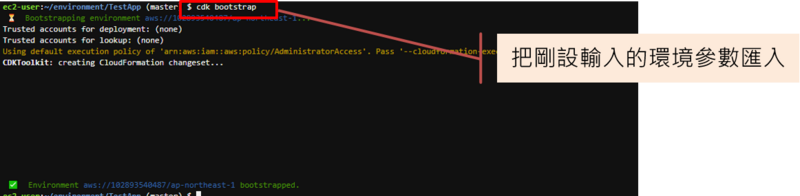
Command:
$ cdk bootsrtap
The environment setup is finish.
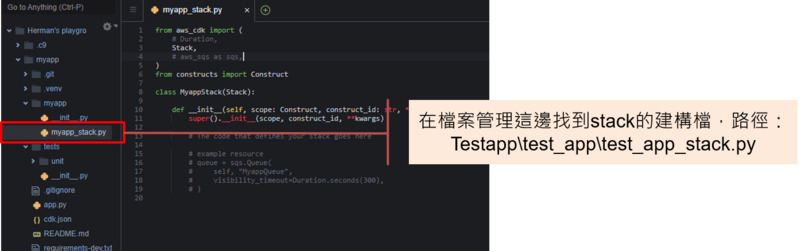
Using the CDE we just created, let see how CDK will help while build template.
Everything you want to deploy will be defined here.
Path should look like: Testapp¥test_app¥test_app_stack.py
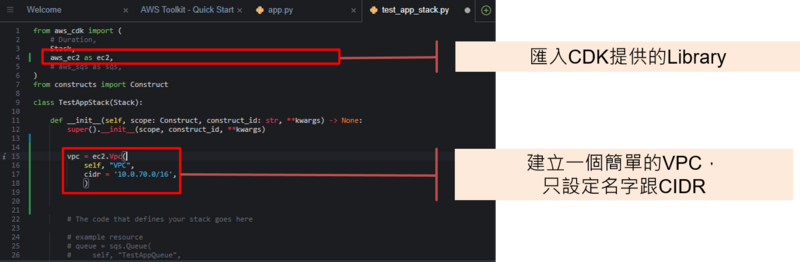
Import CDK library, add code to define our VPC into constructor.
When you using CDK to define resource you want to deploy, you don’t need to define every details about your resource, CDK will according your code to determine what resource you will need to make it a fully functional application.
Here we only define the name and CIDR of the VPC, other details left as blank.

Command:
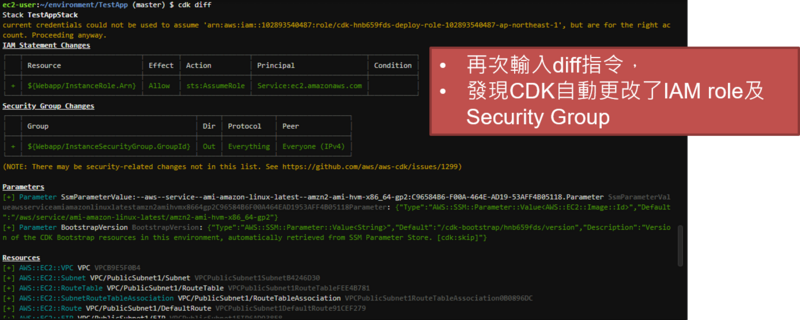
$ cdk diff
Sometime it will run into an error when CDK module not found, use this command to fix it:

Command:
$ pip install –r requiremnts.txt
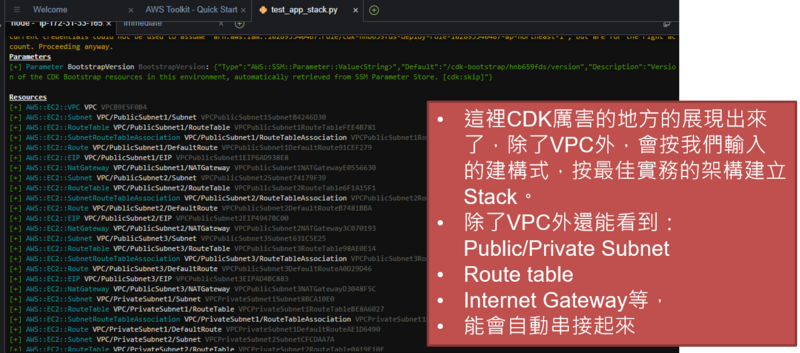
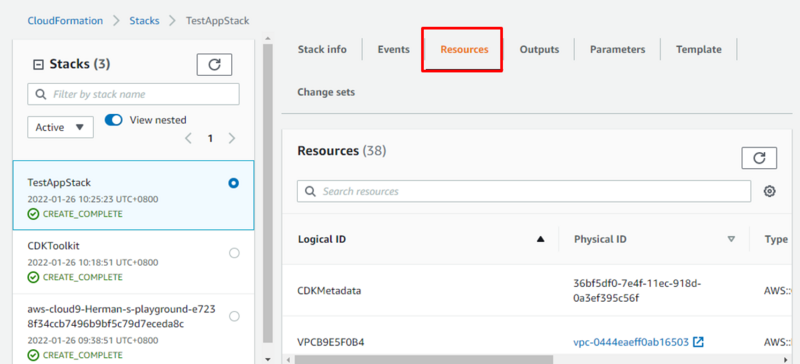
In the constructor we changed, only define we want to deploy one VPC, but check the resource will be deploy it shown resource we didn’t define, such as public and private subnets, routes, internet gateway and security group etc. that when you building an application the resources you need (according the AWS well-architecture).
These is how CDK help us to deploy, Resources are according our code to decide needed or not.
EC2 instance details we will define:
1. Name;
2. Instance_type will be t2.micro;
3. Machine_image will be Amazon Linux;
4. VPC is the one we just defined.
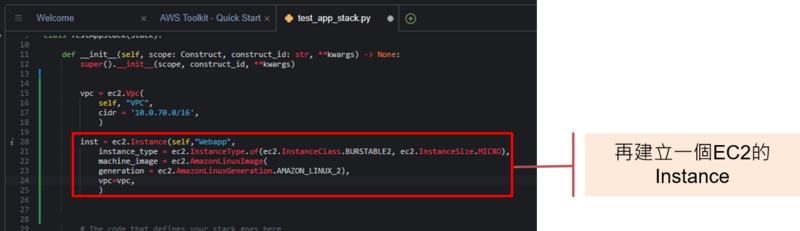
Because of ec2 instance, CDK added IAM role and security group change for it.
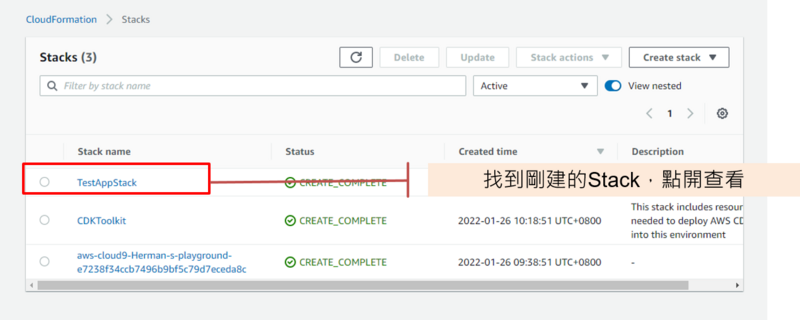
Confirm every resource, which will be build, are correct then use CDK deploy it.
 Command:
Command:
$ cdk deploy
After a successful deployment, Stack ARN will be shown.


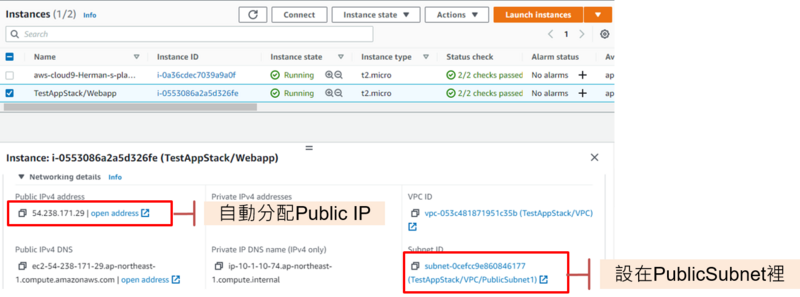
CDK can let user modify and adjust the details of resources, here we will modify the EC2 instance’s subnet setting for showcase.

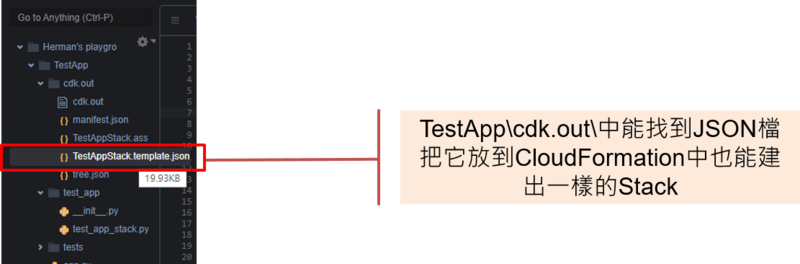
Using CDK to export JSON template, which can use by CloudFormation, and Clean up.
Export JSON file can let you deliver to other environment and setup the same application, without rewriting JSON or code.
 Command:
Command:
$ cdk synth
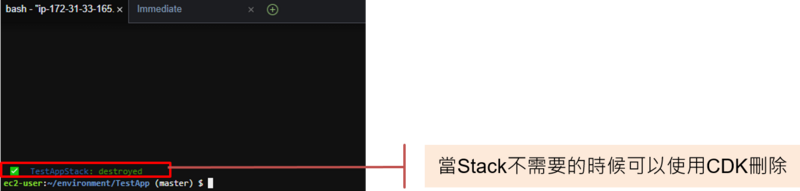
When the stack became unneeded, you can delete it by using cdk command.
Command:
$ cdk destroy
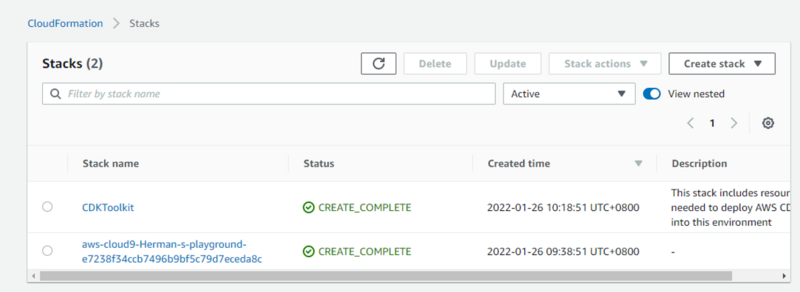
Step 4 Back to CloudFormation confirm the stack is already deleted.
By using AWS Cloud9 and CDK, you can use programming language to define your resources, and utilizing CDK automatically deploy the resources that are needs as a complete application. You can even using programming logic to deploy it reputably make it even faster and easier than normal deploying process.
Another thing to mention, because it is CaaS (Code as Service) you can take more advantage when you deploying serverless architecture.
https://docs.aws.amazon.com/zh_tw/cloud9/latest/user-guide/welcome.html